Showing posts with label Sweet Breads. Show all posts

Monday, March 4, 2013

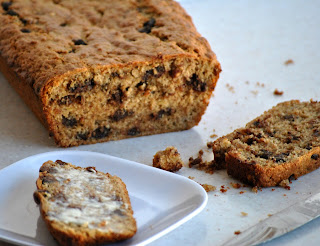
Pumpkin Chocolate Chip Bread

One of my favorite breakfasts ever is Pumpkin Pie Oatmeal.  I make it all year long much to my children's dismay.

But whenever I make it I always have 1/2 a can of pumpkin left over (you know cause I never buy the small can of pumpkin from the store because that would be way too easy).  

I'm ashamed to admit but most of the time it goes bad in the fridge.  I completely forget it's there and then before you know it it's growing mold (hopefully that's not too much info there).

This time I resolved to not let that baby go bad.  And of course the first I think of to make is a sweet bread.  My kids love it and I couldn't believe I hadn't ever posted a simple pumpkin chocolate chip bread before.  This bad boy was a hit for an after school snack and because it makes two loaves I sent the second with the hubs to work.  The chocolate chips are everyone's favorites but this bread is moist and completely delicious.

Pumpkin Chocolate Chip Bread

(click here for printable version)

2 1/2 cups all purpose flour
1 cup whole wheat flour
2 tsp baking soda
2 tsp cinnamon
1 tsp nutmeg
1 tsp salt
3 cups sugar
1 cup oil
2/3 cup water
16 oz pureed pumpkin
4 eggs
1 cup semi sweet chocolate chips

1. Preheat oven to 350°F. Grease 2 loaf pans (9x5 and I use stoneware which helps sweet breads cook much more evenly) and set aside.

2. In a medium bowl combine flour, wheat flour, baking soda, cinnamon, nutmeg, and salt.  Set aside.

3. In the bowl of stand up mixer, beat sugar, oil, water and eggs until completely combined. Add pumpkin and mix again. Slowly add dry ingredients and let mix until no dry ingredients remain.  Stir in chocolate chips. Pour batter equally between two prepared pans, smoothing the top.  Bake 60-70 minutes or until toothpick inserted in center comes out clean. Let sit in pans 10 minutes before removing to cooling rack and letting cool completely. Enjoy!

Friday, October 12, 2012

Pumpkin Cream Cheese Bread

And the winner is:  #51 Tara who said, "I like Shabby Apple on Facebook".  I emailed you Tara so get back to me with your information so we can get you your gift card.  Congrats!

Sometimes things come along and make me smile.  Quite unexpectedly.  And I love it.

Like this bread for instance.  Not only is it smiling, literally, I smiled and smiled when I found that I had never posted it for you.  I made this goodness last fall and everyone went nuts about it.

The pumpkin bread is absolutely delicious and then with a surprise layer of cream cheese.  Amazing!  It is perfect for the cooler weather and fall.  And don't blame me if you eat the whole thing :)

Pumpkin Cream Cheese Bread

(click here for printable version)


2 (8 ounce) package cream cheese, softened
1/2 cup sugar
8 ounces dairy sour cream
1 egg
3 cups all-purpose flour
2 tsp baking soda
2 tsp ground cinnamon
1 tsp ground ginger
1 tsp ground nutmeg
1/2 tsp salt
2 cups sugar
4 eggs
1 15 ounce can pumpkin
1 cup cooking oil
1/3 cup water

1. Preheat oven to 350°F. Grease the bottoms and 1/2 inch up the sides of two 9x5x3-inch loaf pans. Set aside.

2. In a medium bowl, combine cream cheese and the 1/2 cup sugar. Beat with an electric mixer on medium speed until combined. Add sour cream and the 1 egg; beat until combined. Set aside.

3. In another medium bowl, stir together flour, baking soda, cinnamon, ground ginger, nutmeg, and salt; set aside.

4. In a large bowl, combine the 2 cups sugar, the 4 eggs, the pumpkin, oil, and water. Beat on low speed until combined, scraping side of bowl occasionally. Gradually add flour mixture, beating until completely combined and smooth.

5. Spoon 1-1/2 cups of the pumpkin batter into each of the prepared pans. Divide the cream cheese mixture between pans, spreading evenly (tip: it seems easier to dollop the mixture and then very carefully spreading it to the edges). Spoon the remaining pumpkin batter onto cream cheese mixture, spreading evenly.

6. Bake for 60 to 70 minutes or until a toothpick inserted in the center comes out clean. Cool in pans on wire racks for 10 minutes. Remove bread from pans. Cool completely on wire racks. Wrap and store in the refrigerator overnight before slicing. Store any leftover bread in the refrigerator for up to 1 week. Enjoy!

Source: Slightly adapted from Better Homes and Gardens

Monday, July 23, 2012

Cream Cheese Banana Bread

See that beautiful goodness!!  Ahh...I love it.

We are back from a week long family vacation.  It was so nice to get away, have other people cook for me, ride horses (my daughters were in absolute heaven), and visit Yellowstone National Park.  

Believe it or not, growing up in Idaho, I had never been to Yellowstone before.  Wow!  The kids loved it and I loved how absolutely beautiful it was.  Amazing.

But speaking of other people cooking for me, we got to spend at night at a Guest Ranch that one of my sisters is the head chef for.  Emily, who does guest posts for me sometimes, got to be the head guru this summer and we got to enjoy her delicious food.  It was wonderful.  We also got to spend a night with another sister that works at a Dude Ranch.  You know you are in the wilds when you have to carry bear spray with you, right Jess!!

Now that we are home, it's back to life and back to some of this deliciousness.  The hubs and the kids said this bread was amazing.  I mean how could it not be with a whole thing of cream cheese in it.  Anything is so tasty after that!  Another perfect way to use old ripe bananas.

Cream Cheese Banana Bread

(click here for printable version)


1 (8 oz.) pkg. cream cheese, softened
1 cup sugar
1/4 cup butter, softened to room temperature
2 super ripe bananas
1 tsp vanilla
2 eggs, beaten
2 1/4 cup flour
1 1/2 tsp baking powder
1/2 tsp baking soda
1 c. chopped nuts (walnuts or pecans and totally optional)

1.  Preheat oven to 350°F.  Spray a loaf pan with non stick cooking spray and set aside.

2.  Combine cream cheese, sugar, butter, vanilla, banana and eggs in bowl of stand mixer and mix until well blended.

3.  In medium bowl combine flour, baking powder, and baking soda.  Add to cream cheese batter and whip until dry ingredients are barely mixed in, being careful to not overmix (which creates very dry bread).  If you are using nuts, fold in until evenly distributed.

4.  Pour your prepared loaf pan and bake for 1 hour and 10 minutes or until a toothpick inserted in center comes out clean. Cool 5 minutes, before removing from pan to cool completely on a cooling rack.  Slice and enjoy!

Source: I Should Be Mopping the Floor

Monday, March 5, 2012

Twix Banana Bread with Peanut Butter Glaze

I was having a conversation the other day with a friend.  I had told her we had made this bread and that all of us (including every single kid) couldn't stay out of it, it was that good.

She said, "Well of course it has Twixes in it!"

Then we proceeded to have a conversation about candy bars, which kind was good, which kind are good to bake with, etc.  And the conclusion I came to was: pretty every single one!

Seriously, peanut butter twixes are definitely at the top of my favorites but you can't leave out peanut butter m&ms, or butterfingers, or snickers, or reese's peanut butter cups.  The list is practically endless and I have found no end to the ideas of things we could put them in besides just eating them.

Candy bars are one of those things I just can't have sitting around my house.  If I buy them I have to put them in a recipe almost immediately because they call to me from the cupboard saying naughty things, like "i'm so good, come and eat me" or "you can just go work out in the morning if you eat me, it's not really a big deal" or "I'm not THAT bad for you".  

You see what I have to put up with??!!

Needless to say these twixes came into the house and almost went straight into this bread (just a few pieces missing).  It turned out fabulous.  We all loved it and the peanut butter glaze put a wonderful finishing touch on it.

Twix Banana Bread with Peanut Butter Glaze

(click here for printable version)


Bread:
1/2 cup butter, softened
1 cup sugar
1 tsp vanilla
2 eggs
1 1/2 cup flour
1 tsp baking soda
1 tsp salt
1 cup mashed banana (about 3)
1/2 cup sour cream
2 c. chopped twix bars (about 4 regular candy bars)

Glaze:
1/4 cup peanut butter
1/4 cup milk
1/2 cup powdered sugar
1 tsp vanilla

1.  Preheat oven to 350°F. For the bread, beat the butter and sugar until creamy, about 2 minutes. Add the eggs and vanilla and beat again. Stir in the baking soda and salt. Slowly add the flour to the mixture while the mixer is running. Do not over beat.

2.  Fold in the bananas, sour cream and twix bars by hand until incorporated, don't over mix. Pour into a 9x5 pan that has been sprayed with non stick spray. Bake for 1 hour and 5 minutes. Check with a sharp knife or toothpick to see if it is done...if not, bake another 5 minutes. Let cool for 10-15 minutes in the pan, then remove and cool completely on a wire rack.

3.  For the glaze, combine all the ingredients in a smal bowl and whisk until smooth.  Spread over top of bread, when cooled completely.  Serve and enjoy!


Source: Inside Bru Crew

Monday, January 23, 2012

Peanut Butter Banana Bread with Chocolate Chips

 I use to think that January was the most boring month ever.  Any of you with me on that?

Maybe because it's the let down of the holidays or just because it starts to get really cold, at least it use to here in Idaho, lately that's not been the case.  Our beautiful snow melted off completely and it's now been raining for 4 straight days.

Anyways, back to January.  This year I thought surely this month is not going to be boring.  We are going to play and stay busy and just enjoy it for what it is, a month of getting back into the routines and cleaning up from the holidays--physically and emotionally.

So now that January is more than half over, I am absolutely amazed.  This month has flown by and I can hardly find two seconds to make a recipe or read a book.  Maybe that's because I have two new responsibilities in my church, one being super big and pretty overwhelming at the moment but hey, it's made January not boring! 

So here's to making January a not boring month and to some delicious sweet bread because sometimes the thing that makes me feel better and less stressed is some awesome comfort food.  I really enjoyed this bread but I am a peanut butter on your banana kind of person.  The flavors are very mild and go well together and you can never go wrong with adding some chocolate!

Peanut Butter Banana Bread with Chocolate Chips

(click here for printable version)


3/4 cup unbleached flour
1/2 cup whole wheat flour
6 tbsp. white sugar
6 tbsp. brown sugar, packed
1 tsp. baking powder
1/2 tsp. baking soda
1/4 tsp.n salt
3 medium very ripe bananas, mashed
1/3 cup crunchy peanut butter
2 tbsp. plain fat-free yogurt (or sour cream)
1 large egg
1 tsp. vanilla
2 tbsp. canola oil
3/4 cup mini semi-sweet chocolate chips tossed in 1 tablespoon flour

1.  Preheat oven to 350°F.  Spray 9X5 inch loaf pan with cooking spray.  Add a strip of parchment paper or wax paper to bottom of loaf pan, also spraying with cooking spray, for easy removal.

2.  In medium mixing bowl combine flour, sugar, baking powder, baking soda, and salt in bowl; set aside. In bowl of a stand mixer, cream bananas, peanut butter, yogurt (or sour cream), egg, vanilla, and oil. Fold in flour mixture until no streaks of flour remain, then gently fold in chocolate chips.

3.  Scrape batter into loaf pan. Bake 40-50 minutes, or until toothpick comes out with few moist crumbs. Cool in pan on wire rack 15 minutes; carefully remove from pan, removing paper from the bottom, and allow to cool completely on wire rack before slicing.  Enjoy!

Source: For Goodness Sake

Friday, December 30, 2011

Orange Rolls

When the oranges start appearing in all the stores (at least in Idaho) I am in heaven.  It's one of the reasons I love this time of year.  

I love the smell of cutting them open and it just makes me want to sit down and contemplate life.  It also makes me want to start baking with them.  Mmmm...so yummy!

We usually fight over them in our house, that's how much we all love them.  This year though I bought an entire case so no one had to worry about getting their share.  They are our go to snack and they are one of my favorite things to cook with.

Our very most favorite to make with them are these beauties.  With orange peel in the filling and orange juice in the glaze, you can't go wrong.  They are absolutely heavenly!

Orange Rolls

(click here for printable version)


Dough:
2 cups milk
1/2 cup butter
2 tsp. salt
1/2 cup water
1/2 cup sugar
2 Tbsp. yeast
2 eggs, beaten
Grated orange rind from 1 orange
8-10 cups flour

Filling:
1/2 cup butter, melted
1 cup sugar
Grated orange rind from 2 oranges

Glaze:

1 1/2 cups powdered sugar
3 Tbsp. freshly squeezed orange juice from 1 orange
1/2 tsp. grated orange rind/zest reserved from the filling above
1 Tbsp. butter, melted


1.  Heat milk, butter, salt, water and sugar in saucepan on stove until warm.  Pour into mixer fitted with dough attachment.  Add yeast and eggs and let stand until frothy, about 4-5 minutes.  Add orange rind and enough flour to make a soft dough (in my Bosch mixer that is when the doughs stops sticking to the sides).  Let knead in mixer for 2-3 minutes.  Dump into greased bowl, cover, and let rise until double in size.

2.  While dough is raising make filling by combining melted butter, sugar and orange rind.  When dough is raised, punch down and divide in two parts. Roll out, one at a time, into large circle, about 1/4 inch thick.  Spread half of the sugar mixture on dough.  Starting at one edge, roll up tightly.  Cut with string or sharp knife into the size you like, I do about 1 inch.  Lay on greased cookie sheet an inch apart.  Repeat with half of dough using the rest of the sugar mixture.  Let rise until double in size and bake at 375°F for 17-19 mins or until lightly browned.

3.  While rolls are baking, combine glaze ingredients, whisking until smooth.  Let rolls sit 5 minutes then spread glaze on each orange roll.  Serve warm and enjoy!

Friday, September 30, 2011

Pumpkin Pull-apart Bread with a Buttered Vanilla Glaze

Did you know that autumn is officially here?

Not that we are having real fall weather here (we will hit 90° today) but still the calendar says we are official as of September 23rd.

And since we are official it's on to everything pumpkin and Halloween.  I try really hard to wait till after the official day of fall before I pull out all my pumpkin recipes that I have been saving for a year and try not to make them all in one day.

But it's really hard to choose which ones to make because I have at least 50 saved in my bookmarks not to mention they are popping up everywhere on pinterest.

As a random side note, I completely and totally love pinterest.  I could spend hours on there and I find the most amazing things (not that those things get accomplished--especially the crafty projects).  But the recipes are to die for.  
That's where I found this lovely lady.  Isn't she beautiful?

So pumpkiny and so fall.  And so delicious.  The kids devoured almost the whole loaf that night and even asked for some to go in their lunch boxes.  I love when they love it!

I have been wanting make this pull apart bread for a long time but have been putting it off.  Who knows why, I think maybe it's because it looked a little different and weird for bread to be cooked like that but I finally decided to give in and just do it.  And it was so much easier than I expected, not to mention it looks fancy and it's delicious.  Woot!

Perfect for a fall day.

Random side note:  see those leaves in the pictures?  I couldn't resist using them because they are so pretty and represent fall completely.  My tree is turning colors, which I absolutely love, but which the hubby doesn't really like cause that means raking season is going to start!  Ahhh...the joys of yard work.

Pumpkin Pull-apart Bread with a Buttered Vanilla Glaze


Bread:
2 Tbsp unsalted butter
1/2 c. hot milk (I just used the microwave)
2 1/4 tsp. active dry yeast
3/4 c. pumpkin puree
1/4 c. white sugar
1 t. salt
2 1/2 c. bread flour

Filling:
1 c. granulated sugar
2 tsp. ground cinnamon
1/2 tsp. fresh ground nutmeg
2 Tbsp. unsalted butter

Buttered Vanillla Glaze:
2 Tbsp. unsalted butter
1/8 c. brown sugar
1 1/2 Tbsp. milk
3/4 c. powdered sugar
1 tsp. pure vanilla*

*Can substitute 1 Tbsp. of rum for vanilla

1.  In a saucepan over medium-high heat, brown 2 tablespoons of butter, letting it bubble up and turn a dark golden brown but being careful not to allow it burn (turn black). Once browned, remove the pan from the heat and carefully add the hot milk, return to stove and heat through. 

2.  Pour the milk and butter into the bowl of stand mixer, fitted with a dough hook, and allow to cool so it is no longer hot but also not cool (about 100-110 degrees F). Once it has reached a warm but not hot temperature add the yeast and 1/4 cup of sugar and allow to bubble (this can take up to 8 minutes, the top will look foamy and the liquid cloudy). Then add the the pumpkin, salt, and 1 cup of flour. Stir until combined then add the rest of the flour 1/2 cup at a time and knead for 6 minutes, until the dough is smooth and elastic and just slightly sticky. If the dough is too moist, add extra flour 1 tablespoon at a time.

3.  Move dough to a lightly oiled bowl and cover with a clean towel. Allow to rise in a warm place for 60-90 minutes or until doubled in size.

4.  While dough is rising, brown another 2 tablespoons of butter. Add the sugar, cinnamon, and nutmeg and mix well.  Making sure sugar evenly absorbs the butter. Set aside. Next, grease and flour a 9x5 loaf pan and set aside.

5.  When the dough has doubled in size, punch it down and flip out onto a clean floured surface and knead with hands for 1-2 minutes. Roll dough into a 20x12 inch rectangle.  Evenly sprinkle the dough with the cinnamon sugar mixture and press into dough with palms of the hand. Cut the rectangle into 6 strips. Lay strips on top of each other and cut each strip into 6 even squares (cut in half then each half into thirds). Stack strips vertically into the loaf pan. Cover the pan with a clean towel and let rise for 30-45 minutes.

6.  In the meantime preheat an oven to 350 degrees. After rising in the pan bake for 30-40 minutes (mine took 35 exactly but I was using a stone so just keep an eye--or two--on it) or until top is a very deep golden brown.  Remove and let cool for 10 minutes.

7.  While bread is cooling, make the glaze.  Heat the butter, milk, and brown sugar in a small saucepan. Bring to boil then immediately remove the pan from the heat and stir in the vanilla and powdered sugar.  Whisk until smooth.

8.  Remove bread from pan, drizzle with glaze, and eat immediately.  Enjoy!


Monday, September 5, 2011

The Best Zucchini Bread (so far)

Happy Labor Day!

I hope you have some fun plans that include some great food (and maybe some football).

We do.  Mostly because we have been hanging out with family for a week. Every time we get together with my family we are known to try new recipes, make lots of food, and eat amazing food.

There is never a chance that we will go hungry at my parent's house.  My brother-in-law always jokes that he gains 10 pounds every time he comes and visits. 

The other fun part about getting together this time of year is all the football and tailgating recipes that we pull out after a year of sitting in the dark.  We love sliders, chilis, brauts, and lots of homemade salsa and guacamole.  Mmmm....so good.

I wish I had one of those recipes ready for you but we have been having lots of fun playing with cousins, visiting with family members we haven't seen in months, and having football parties so the recipe didn't get put together so here is a new zucchini bread we tried. 

I think it's the best we've had so far.  I love that we don't have to add a cup of oil and that it uses butter and yogurt.  So yummy and perfect for zucchini you have laying around!

The Best Zucchini Bread

(click here for printable version)


1 pound zucchini
2 c. flour
1 tsp. baking powder
1 tsp. baking soda
1 tsp. salt
1 tsp. ground cinnamon
1 tsp. allspice
1 1/2 c. granulated sugar
2 large eggs
1/4 c. plain yogurt (not fat-free)
1 Tbsp. fresh lemon juice or sour cream
6 Tbsp. butter, melted

1.  Adjust an oven rack to middle position and preheat the oven to 375 degrees. Generously coat a 9-inch by 5-inch loaf pan with crisco and flour.

1.  Chop 1/4 inch off the ends of the zucchini and finely shred the zucchini, peel and all. Place the shredded zucchini in a clean kitchen towel, wrap the towel, and wring the ends (like a an old-fashioned candy wrapper) to squeeze out all the excess water. You should have about 1 to 1 1/2 cups of dry zucchini. Set the zucchini aside.

2.  In a large bowl, whisk together the flour, baking soda, baking powder, cinnamon, allspice, and salt. In a smaller bowl, whisk the sugar, yogurt, eggs, lemon juice or sour cream, and butter until combined. Gently fold the yogurt mixture and zucchini into the flour mixture, using a rubber spatula to fold the ingredients together until just combined. Transfer the batter to the prepared pan.


3. Bake until golden brown and a think knife or skewer inserted in the center comes out with a few crumbs attached, 45-55 minutes. Cool for 10 minutes then turn out into wire rack to cool for at least 1 hour. Store well-covered for up to three days.  Enjoy!

Source:  Mel's Kitchen Cafe

Wednesday, November 24, 2010

Pumpkin Cinnamon Rolls

Happy Thanksgiving!!  I hope you all have a wonderful Turkey Day and eat some amazing food--I know I will, my moms in charge this year :)!!!!
I told you, I am on a pumpkin kick again.  These were good, I wouldn't say my favorite because I would like them to taste more pumpkiny (is that a word?). I am going to work on altering the recipe next time but they were still really good.  Maybe that's because I added cream cheese frosting instead of the glaze--it's that pumpkin cream cheese duo again.  So good in fact that I took two large cookie sheets full to a church activity and they were gone within 3 minutes.  I'm serious!  I even caught one teenager scraping up bits with his fingers from the pans!!

2 T. dry yeast
1/2 c. warm water (it should be hot enough that when you stick your finger in it that it registers as hot but not too hot that you can't leave your finger in it--does that help?)
4 eggs
1 c. shortening
1 c. canned pumpkin
1 c. warm milk
1/2 c. sugar
1/2 c. packed brown sugar
1/3 c. instant vanilla pudding mix
1/3 c. instant butterscotch pudding mix ( I didn't have butterscotch on had so I used a cheesecake flavor)
1 t. salt
7 to 8 c. all-purpose flour

FILLING:
1/4 c. butter, softened
1 1/2 c. packed brown sugar
2 T. ground cinnamon

FROSTING:
8 oz. cream cheese, softened
1/2 c. butter
1 T. vanilla
1 lb. powdered sugar

1.  In the bowl of a large electric mixer (like a Kitchenaid or Bosch), dissolve yeast in warm water. Add the eggs, shortening, pumpkin, milk, sugars, pudding mixes, salt and 6 cups flour. Beat until smooth. Add in enough remaining flour to form a soft dough (dough will be slightly sticky and in a Bosch will pull away from the sides).  Let it knead for 2-3 minutes. Place in a greased bowl, turning once to grease top.
  
2.  Cover and let rise in a warm place until doubled, about 1 hour. Punch dough down; divide in half. Roll each portion into a 12-in. x 8-in. rectangle; brush with butter. Combine brown sugar and cinnamon; sprinkle over dough to within 1/2 in. of edges.  Roll up jelly-roll style, starting with a long side; pinch seams to seal. Cut ( I use a sharp bread knife or a piece of thread also works great) each into 12 slices--mine made a lot more than this. Place cut side down in two greased 13-in. x 9-in. baking pans (I find that using jelly roll pans are a lot easier and they hold a lot more). Cover and let rise until doubled, about 30 minutes.

3.  Bake at 375° for 18-20 minutes or until golden brown.While rolls are cooking, put cream cheese and butter in medium bowl and beat until smooth. Add vanilla and powdered sugar and mix well.  Take cinnamon rolls out of the oven and let cool for 5 minutes.  Spread frosting over warm buns and serve immediately.

Source:  The Idea Room

Sharing this with:  Not So Homemade, Blue Cricket Design.

Monday, August 16, 2010

Zucchini Orange Bread


I love sweet breads and could eat them all day long.  This is one I make often when the zucchini comes on.  It has just a hint of orange and I love the glaze, I mean what is better than adding more sugar to the top!
Also as a side note, if you are having trouble getting your sweet breads done in the center before the outside is burnt try a stone loaf pan.  They work wonders, I promise.


4 eggs
1 1/2 c. sugar
3/4 c. oil
2/3 c. orange juice
2 c. shredded zucchini
3 1/4 c. flour
1 1/2 t. baking powder
1 1/2 t. baking soda
1 t. salt
2 1/2 t. cinnamon
1/2 t. cloves
2 t. grated orange rind
Glaze:
1 c. powdered sugar
2-3 t. orange juice

1.  Preheat oven to 350 degrees.  Grease and flour bottom only of 2 loaf pans (if you are using a stone,  spread a little bit on Crisco on the sides and bottom of the stone).  In a large bowl beat eggs with electric mixer until thick and lemon colored.  Gradually beat in sugar.  With wooden spoon, stir in oil, orange juice and zucchini.  Add flour, baking powder and soda, salt, cinnamon, cloves and orange rind.  Stir just until combined.  Pour evenly into your loaf pans and bake 45-55 minutes or until toothpick inserted in center comes out clean.  Let cool in pans 10 minutes before removing to cooling rack.  Cool 15 more minutes.
2.  While cooling make glaze by combining powdered sugar and orange juice in small bowl and whisking until smooth.  Spread glaze over warm loaves.

Thursday, July 15, 2010

Poppy Seed Pound Cake

Here is that recipe I mentioned quite awhile ago.  I love lemon recipes in the summer. I love the freshness and sunshine that it reminds me of.  This bread was very yummy, especially with a lemon glaze.  

1 1/2 c. flour
1/4 t. baking soda
1/4 t. salt
12 T. butter, softened
1 c. sugar
1 1/2 t. vanilla
1 t. finely grated lemon zest
2 T. fresh lemon juice
1 T. poppy seeds
2 eggs
1/2 c. sour cream

1.  Preheat oven to 325 degrees.  Lightly grease and flour a loaf pan (I used a bundt pan and it worked great too).

2.  In a medium bowl whisk together flour, baking soda and salt.  Set aside.  In large bowl, using an electric mixer, beat butter, sugar, vanilla, lemon zest, lemon juice and poppy seeds together until light and fluffy.  Add eggs, one at a time, beating well after each one. Sprinkle flour mixture over butter mixture and stir until just incorporated.  Stir in the sour cream until incorporated.

3.  Pour the batter into prepared pan and smooth out the top.  Bake until toothpick inserted in center comes out clean, abt. 70 minutes for a loaf pan and 50-60 minutes for bundt pan.  Remove and transfer to wire rack and let cool 15 minutes.  Invert pan on wire rack and remove pan.  Let cool completely. 

Saturday, April 3, 2010

Banana Bread

This is one of my grandmother's recipes.  I love how it turns out every time, moist and with just a hint of banana.  I have tried out several other recipes and always come back to this one.  On a side note, if you have problems with your sweet breads being burnt on the outside and doughy in the middle, try getting a stoneware bread pan.  It is definitely worth the investment if you bake a lot of breads.  Mine were always done in the middle after that, without being burnt on the outside.

1 c. brown sugar
1/2 c. butter, softened
2 eggs
3 very ripe bananas, mashed
3 T. cream or canned milk
1/2 t. salt
1 t. baking soda
2 c. flour

*  Preheat oven to 325 degrees.  In large bowl, cream sugar and butter.  Add eggs and bananas, mix well. In medium bowl, mix salt, baking soda and flour.  Add to sugar mixture in 3 parts, alternating with cream. Mix just until dry ingredients are moist.  Pour into greased loaf pan and bake for 55-60* minutes or until knife inserted in center comes out clean.  Let cool for 10 minutes, remove from pan and place on cooling rack to finish cooling.  Enjoy!

* Note:  if you are using a stoneware loaf pan, cooking times are usually shortened.
Blogging tips