Showing posts with label Vegetable. Show all posts

Wednesday, September 19, 2012

Zucchini Fries

 We are almost at the end of zucchini season here and I am happy to report that a dear friend came through and I have had as much zucchini as I have wanted.  It's been wonderful.

The only problem is that there are others in this house that really, really don't like it.  But I do have one of my daughters who requests that it gets put in everything because she likes it that much.  Can't please everyone!

Because of the haters, I am always trying new ways to have zucchini (maybe one day they might fall in love).  

The thing about zucchini is that is can't be mushy or cooked too long.  It gets quite revolting if it's too soft so this was a perfect way to eat it.  The crust gives it some crunchiness and baking it in the oven makes the zucchini done but still slightly soft and firm.  Just the thing for me.  Plus when you get to dip it, life gets a lot better for all of us.  Dipping made my kids eat two of them--that's pretty good for zucchini haters.

Baked Zucchini Fries

(click here for printable version)


About 1 lb. zucchini
1/2 cup Italian-seasoned panko bread crumbs
1/4 cup grated Parmesan cheese (the bottled variety, not fresh)
2 eggs

1.  Preheat oven to 425°F. Line a baking sheet with aluminum foil and spray with non-stick cooking spray. Set aside.

2.  Combine bread crumbs and parmesan cheese in a shallow pie plate. Set aside.  Whisk 2 eggs together in another shallow pie plate and set aside.

3.  Cut the ends off the zucchini and then cut the zucchini in half, so you have two short, stubby pieces. Set one piece on its end and cut it in half lengthwise. Cut that half in half, making 2 planks. Repeat with the remaining halves (so you’ll get 16 planks per zucchini).

4. Stack 2 planks on top of each other and cut into strips. Thicker strips will yield “meatier” fries with more zucchini flavor while thin strips will be crispy and taste virtually nothing like zucchini. When all the fries are cut, blot the pieces with a paper towel.

5.  Working with a small handful at a time, dip the zucchini sticks in the egg, shake them to remove any excess, and then roll them in about 2-3 tablespoons of bread crumbs at a time, adding more as needed (you don’t want to work with all the bread crumbs at once because they’ll soak up moisture from the egg and won’t stick to the zucchini). Place the coated strips on the prepared baking sheet and repeat until all the zucchini strips have been coated.

6.  Bake for 10-12 minutes then remove from oven, flip the fries, and bake for another 10-12 minutes or until the zucchini is not soggy and the coating is crisp and golden brown. Serve immediately with pizza sauce.  Enjoy!

Source: Our Best Bites

Wednesday, August 15, 2012

Grilled Avocados

Middle of August--wow!

Anyone else out there can't believe that it's school time already?  My kids start in a couple weeks so we have been busy trying to fit in all our last minute summer plans.  

Some of my plans include trying all the new summer recipes I have pinned.  I have a hard time choosing what to make because one of my very favorite things about summer is grilling.  

Everything seems to taste better on the grill!

These grilled avocados were a favorite.  Absolutely delicious.  I have been trying to branch out and try new sides for dinner and this one has definitely made the "make again list".  The hubs and I loved the flavor the parmesan cheese gives the avocado.  So yummy.

Grilled Avocados

(click here for printable version)


1 avocado
1 tbsp chipotle sauce, like Tabasco (completely optional--I put some on 1/2 for the hubs)
1 tbsp lime juice
1/2 cup grated fresh parmesan cheese
Salt and pepper, to taste

1. Slice the avocado in half and remove the stone. Cut criss-cross patterns with a knife in each half of the avocado, being careful not to cut through the skin (this allows the sauce to penetrate the flesh).

2. Pour the sauce over each half (if using), then top with lime juice and salt and pepper. In the cavity where the stone has been, put ¼ of the cheese on each avocado half. Place under the hot grill for 2 minutes.

3.  Top with remaining cheese and broil for another 2 minutes until completely melted and avocado warmed through.  Serve and enjoy!

Source: Morsels and Musings

Wednesday, March 7, 2012

Roasted Cauliflower with Red Pepper Coulis

Now I know that name sounds fancy and complicated but it's really not.

I promise. 

When I first saw this recipe I thought, "what in the heck is coulis!"  I had never heard of it (which might say something about me but I trust some of you haven't heard it either) so I of course did the only natural thing.

I wikipedied it.  Because "wikipedied" is totally a real word!

Wikipedia says that coulis is, "is a form of thick sauce made from puréed and strained vegetables or fruits. A vegetable coulis is commonly used on meat and vegetable dishes, and it can also be used as a base for soups or other sauces. Fruit coulis are most often used on desserts. Raspberry coulis, for example, is especially popular with poached apples."

Sounds pretty cool right?

And the best part, it's not hard at all.  Plus I love being able to mix up my vegetables sometimes.  I kind of get tired of eating the same vegetables the same way.  This red pepper coulis is so mild that it was a perfect combination with the roasted cauliflower and we all loved it at our house.

Roasted Cauliflower with Red Pepper Coulis


Red pepper coulis:
2 red bell peppers
2 tbsp olive oil
1 tsp white wine vinegar
1 clove garlic, minced

Cauliflower:
1 head cauliflower, cut into florets
Olive oil
Kosher salt
Freshly ground black pepper

1.  To make the red pepper coulis, preheat the oven to 475˚ F.  Line a baking pan with foil and place the whole bell peppers on the baking sheet.  Roast until the skin is browned and bubbling, about 15-20 minutes, turning at least a few times during cooking to brown all sides.  Once the peppers are evenly browned, remove them to a plate or bowl and cover with foil (I reused the foil from the baking pan).  Let stand about 15 minutes.  Reduce the oven temperature to 450˚ F.

2.  Remove the peppers from the plate and transfer to a cutting board.  (If they are too hot to handle, let them cool for a few minutes.)  Peel the skin from the outside of the peppers and discard – it should come away easily thanks to the roast/rest technique.  Seed and coarsely chop the peppers.  Place the roasted peppers in the bowl of a food processor along with the olive oil, vinegar, and garlic.  Process until totally smooth.

3.  Place the cauliflower pieces on a baking sheet in an even layer.  Drizzle lightly with olive oil, season with salt and pepper, and toss gently.  Roast, stirring occasionally, until crisp-tender and lightly browned, about 12-15 minutes.  Serve immediately with the red pepper coulis.   Enjoy!

Source:  Annie's Eats

Wednesday, February 8, 2012

Balsalmic Roasted Broccoli


Pin It

Growing up I H.A.T.E.D any cooked vegetable except green beans and corn.  I seriously would gag and throw up if I was forced to eat more than one.

That was always the rule.  You had to at least eat one.  Which as a parent now I am a firm believer in.  I always tells my kids, "how do you know if you hate it unless you try it."  We have found so many things they actually love to eat because they have tried at least one piece.

Anyway...broccoli was at the top of my list of "absolutely hate vegetables".  The funny thing is that I would eat pretty much anything raw; carrots, cauliflower, broccoli, peas, etc.  But if you so much as cooked one of them, I was done.

As I got older I started trying new vegetables again, mostly because I didn't want my kids to be as picky as I was.  And I learned that I L.O.V.E. most of them (I still cannot eat cooked peas bo matter how many times I try them--bad experience as a kid).  Broccoli is now at the top of "vegetables I love and crave" list.  

The awesome thing is that I have two kids that love broccoli almost as much as me and the hubs.  Kathryn asks for it all the time--yeah!!  I love that.

Because of this I always love new ways to cook those veggies.  We love to steam or roast them (awesome with pretty much anything!).  This combines the roast will an amazing balsalmic sauce.  It was absolutely delicious.  I even made some extra sauce and added it to stir fry the next night.  So delicious!

Balsalmic Roasted Broccoli


1 pound broccoli
1 1/2 tbsp soy sauce
1 tbsp olive oil
1 tbsp balsamic vinegar
2 tbsp honey
1 tsp peanut butter
1 tbsp toasted sesame seeds


1. Preheat your oven to 425°F.  Wash your broccoli and cut off the big stems. Spray a large cookie sheet with cookie spray and place the broccoli on it. Spray the top of the broccoli with cooking spray.

2. Roast the broccoli for about 10 minutes, or until a fork can be easily inserted.

3. While the broccoli is roasting, put soy sauce, olive oil, balsamic vinegar,  honey and peanut butter into a small sauce pan. Heat the sauce over medium high heat. When it boils, remove it from the heat.

4. When the broccoli is done, put it in a medium sized mixing bowl and pour the sauce over the top. Stir it all around, making sure each broccoli piece has sauce on it.  Sprinkle toasted sesame seeds over the broccoli and serve.  Enjoy!

Source: Jamie Cooks It Up

Friday, September 23, 2011

How to Cook Corn on the Cob

I know corn on the cob season is almost over but as we were sitting at dinner the other night reflecting on how delicious the corn was that we were eating, my husband and I started talking about how people cook it so differently.

Growing up my dad was in charge of cooking the corn.  It always came out perfect and I assumed that everyone knew the best way to have this amazing little veggie.

As we were talking I realized that we had had some disgusting pieces of corn.  Mostly because the cooker didn't know how to cook it.  Corn is simple and doesn't need to be cooked very long.  This is one of the biggest mistakes people make.

This is what we do.  Barring that you don't have old corn, it will turn out amazing.

1.  First get the freshest corn you can find.  I prefer a bi-color (yellow and white) because they tend to be sweeter.  

2.  Schuck the corn and remove as much of the "hair" as possible.  Rinse each ear.

3.  In a large pot, bring water to a boil on high heat.  Your pot needs to be big enough that the corn can fit all the way in.  As soon as the water boils (and not one moment before) put corn in, making sure to cover pot with a lid.

4.  Let corn cook, covered, until water comes back to a boil.  This should take about 5-6 minutes, nothing longer.  Remove corn immediately and serve with butter and salt and pepper.  Enjoy!

Wednesday, August 17, 2011

Zucchini Pizza

I know, I know...zucchini pizza?

Well when the zucchini just won't stop growing and all your efforts at killing it just won't work and you are finding random bags left at your door you know it is time to get super creative.

Anybody with me on this?

If you have never grown something before, try a zucchini plant.  They are super sturdy (trust me they never die especially when you want them to), they always produce many zucchinis (have you heard of the phrase that one zucchini plant will feed a neighborhood?--it's totally true), and they are very good in everything from desserts (chocolate zucchini cupcakes or zucchini bread) to main dishes (pizza, meatloaf, zucchini boats) to side dishes (grilled zucchini).

The other day my friend gave me some round zucchini (thanks Aubrey).  I had never seen ones like these.  But I knew they would be perfect for my next zucchini idea.
Pizza.

Plus I was hoping that if I slathered it with cheese and pepperoni my kids would eat it!  They are getting "fonder" of zucchini but hey one day I know they are going to appreciate all my creative ideas with this plentiful little vegetable.  Maybe!?!

Zucchini Pizza


Round zucchini
2 Tbsp. olive oil
Garlic Seasoning (I prefer Santa Maria)
Pizza sauce
Mozzarella cheese
Pepperoni

1.  Preheat your grill.  Cut your zucchini into 1/4" slices.  When your grill is ready brush one side of zucchini with olive oil and lay flat on grill.  Brush olive oil on side facing up and sprinkle with garlic seasoning.  Watch carefully so they don't burn.  I keep my grill at medium low the whole time.  When the bottom side is light brown and has some nice grill marks, flip over.  Immediately put pizza sauce, pepperoni, and cheese on each zucchini piece and let sit in grill, with top down, until bottom is light brown and cheese is melted.  Remove carefully and serve.  Enjoy!

Monday, January 17, 2011

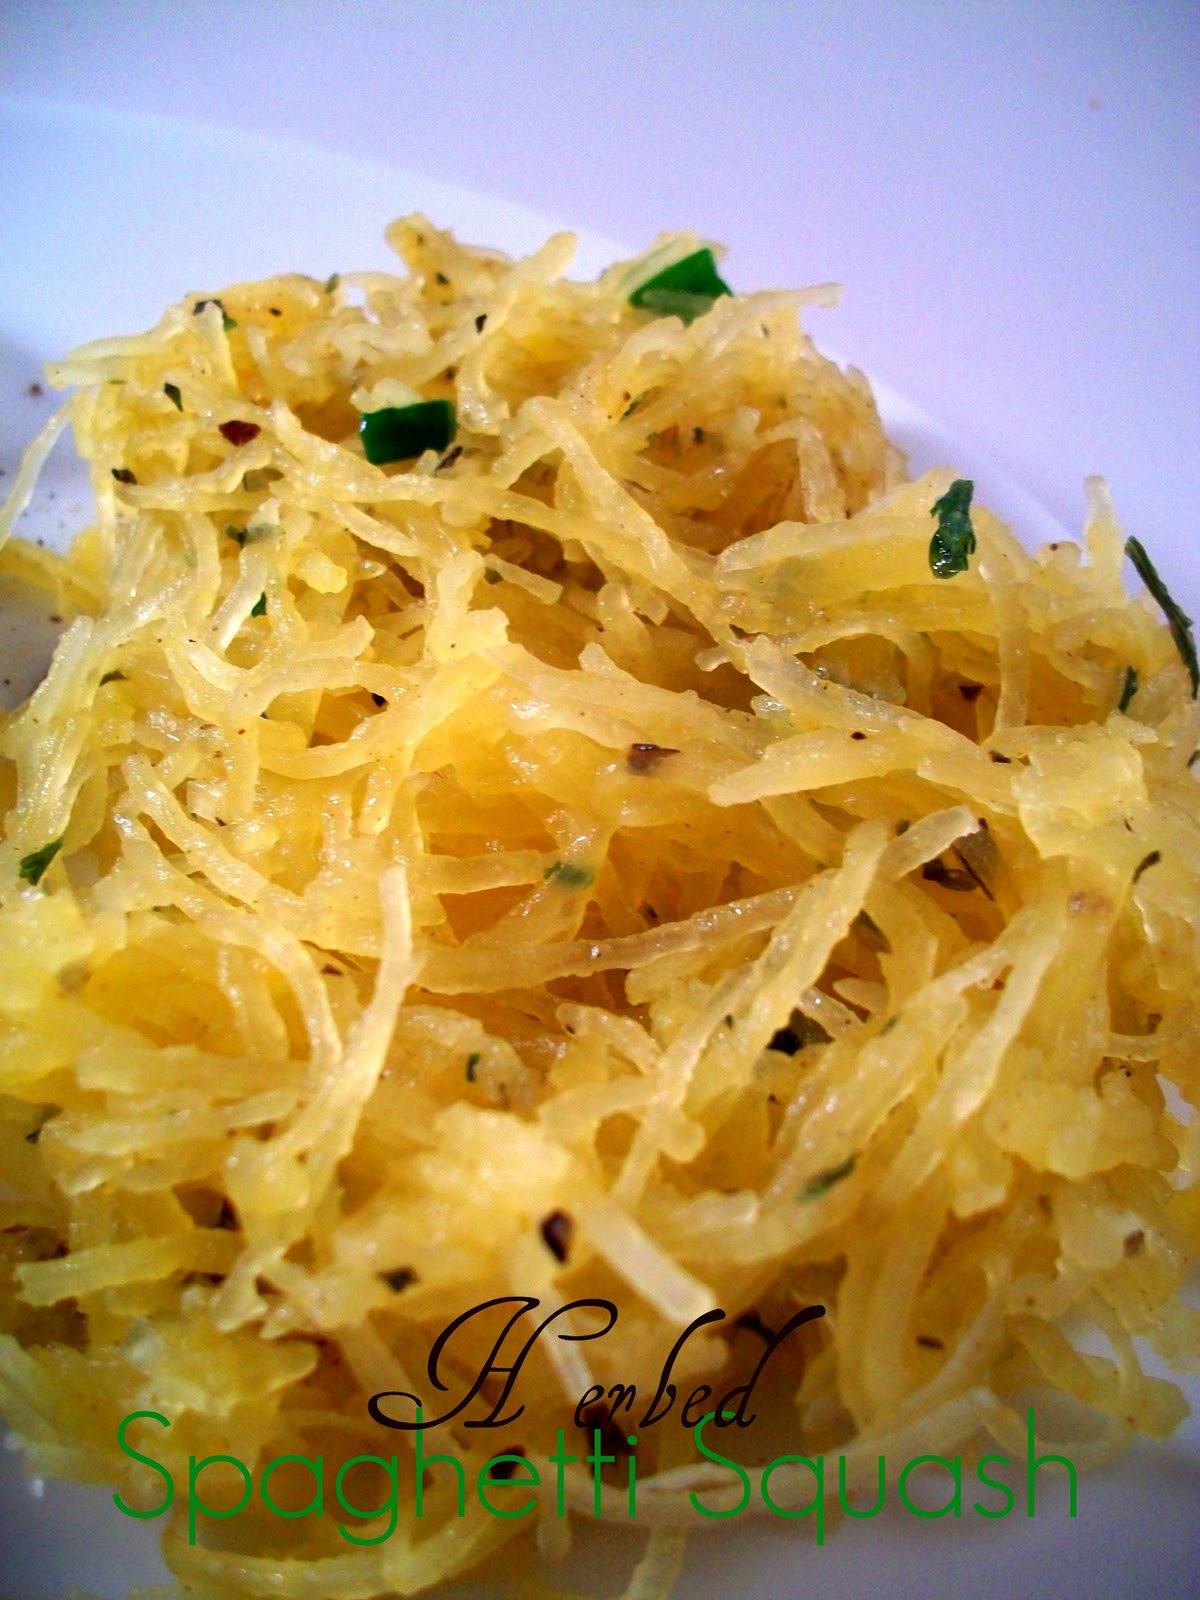
Herbed Spaghetti Squash

Honestly I dislike squash--you know like the butternut kind (nothing against the butternut).
I don't hate it but...it has a weird texture and it's just not my favorite vegetable.
My kids totally H.A.T.E. it though, I don't know if those big letters even cover their feelings for this particular vegetable.
Maybe it's because I make them try it (and swallow it, my 6 year old thinks she can just stick it in her mouth and that should work--not at this house).

Well with that introduction maybe you don't want to try this now, but as much as I dislike squash, I really liked this spaghetti squash.
I have never had it before, never even cooked it before, but this little beauty came in my Bountiful Basket and I didn't want to waste it so after I perused some recipe sites I settled on this variation.
I was so pleasantly surprised.  The texture is completely different than any other squash I have had and it really looks like spaghetti noodles, hence the name, he he he!
I encourage you to branch out and try it.  You might like it and if you don't I'm sorry but I totally understand.

Small spaghetti squash, about 2 1/4 pounds
2 1/2 T. buter
2 1/2 T. finely chopped mixed soft herbs, such as basil, chives, parsley and sage (I used a little bit of everything)
1/2 t. salt
1/8 t. freshly ground black pepper

1.  Preheat oven to 375 degrees .  Using a sharp knife (I didn't know squash could be so tough--I had to have my husband help with little bit), cut the squash in half lengthwise.  Using a spoon, remove the seeds and discard.  Place, cut side down, in a baking dish. Add enough water to come 1/2-inch up the sides of the baking dish and cover with aluminum foil. Bake for 45 minutes, until the squash is easily pierced with a paring knife. Turn squash over and cover with foil again and continue to cook another 15 minutes, until the squash is very tender. 

2.  Remove from the oven, uncover, and allow to cool slightly. Using a fork, gently pull the strands of squash away from the peel and place the squash strands into a mixing bowl.

3.  Heat a skillet. Add the butter, spaghetti squash, herbs, salt and pepper and toss thoroughly but gently to heat and combine. Serve immediately or cover and keep warm until ready to serve.

Note:  The next day I served this reheated with some spaghetti sauce spooned over the top and parmesan cheese and it was so delicious, I can't believe I just said that about squash, but it's true.  It was really good.

Source:  Emeril Lagasse

Monday, November 22, 2010

Parmesan Roasted Green Beans

Do you have your Thanksgiving menu planned?  These green beans would go wonderfully with your dinner.  They are also a great alternative to your normal green bean casserole.  I loved these, they have great flavor and are so yummy!  The Parmesan adds a little zest to your normal flavor which makes the beans even better.
Do you roast your vegetables?  I roast almost all my vegetables and I think they are much better that way. There are some vegetables I really don't care for but if they are roasted I actually enjoy them (cauliflower, fresh green beans, asparagus, etc.).  The point of roasting is to cook the vegetables at a high temperature so that the sugars will caramelize and the flavor becomes even more intense, but it makes them a little crispy instead of soft and mushy.  I've heard it said that barbecuing is to summer what roasting is to fall and winter.  Try it out, I'm sure you will love it!

2 c. fresh green beans
2 T. olive oil
1 T. Kosher salt
1 t. Pepper
1 t. garlic, minced
Grated Parmesan cheese

1.  Preheat oven to 400 degrees. Place the green beans in a large bowl. Drizzle olive oil over the green beans.  Sprinkle with salt, pepper, and garlic. Toss the green beans to coat them evenly. Sprinkle grated Parmesan cheese over the green beans. Toss again to coat the beans evenly with the Parmesan cheese.

2.  Lay the green beans in a single layer on a baking sheet. Bake for 15 minutes (mine took closer to 25 minutes, so watch carefully) or until the cheese melts and the beans turn a light golden brown  Enjoy!

Source:  It's a Keeper

Tuesday, October 5, 2010

Fresh Salsa

Do you have lots of tomatoes hanging around your house?  I do.  I thought they wouldn't turn red with this cool summer we've had, but they finally did, and I love fresh salsa so I figured that would be a great way to use them up.  I have made it many ways but when I found this recipe on one of my favorite sites I knew it would be fantastic.  We took it to a football party (go Boise State!) and it was gone within a few minutes.  I guess I should have made more, or at least set some aside at my house for later eating.  :)

2 fresh jalapeno peppers, seeded and very coarsely chopped (you can leave the seeds in if you want really hot salsa)
4 cloves garlic, halved
2 large vine-ripened tomatoes
1 (28 0z.) can diced tomatoes (drained or not, depending on how much liquid you want in your salsa.  I used a can of Rotel because I didn't have diced tomatoes on hand and cut out the fresh jalapenos.  It worked great.)
2 T. red wine vinegar
1 T. cumin
1/2 sweet yellow onion, coarsely chopped
1/4 t. salt
1/2 t. ground cayenne pepper
1/4 c. fresh cilantro (I am not a cilantro fan so I left it out)
Juice of one lime

1.  In the bowl of a food processor, combine the jalapenos and garlic.  Process until finely chopped.  Scrape down the sides of the bowl.  Add all other ingredients to the food processor.  Pulse in very brief pulses until the vegetables have reached the size you desire (it does not take many pulses so don’t overdo it).  Transfer to an airtight container and refrigerate at least 2 hours before serving to allow the flavors to blend.

Tuesday, August 24, 2010

Zucchini Ideas

Here are some more ideas for your plethora of zucchini.  I still have it coming out my ears.
It's hard to tell, but instead of using regular lasagna noodles use very thin slices of zucchini as your noodles.  There is no need to pre-cook it, just slice it long ways and use your regular recipe.  It turned out very yummy.
Add zucchini to your pizza.  This is one of my favorite ways to have pizza.  We slice it thinly and add it with as many vegetables as we have from our garden (peppers, onions, etc.)  It makes the pizza a little bit healthier and very delicious.

Saturday, August 7, 2010

Grilled Zucchini


It's that time of year.  Does anyone else have zucchini coming out their ears?  We sure do and right now I am loving it.  There are so many things to do with zucchini and in the next few weeks I will share several different ways to have them as main dishes, desserts and side dishes.  This one is one of our absolute favorites.  I love zucchini "barely done", not squishy or slimy so the times are based on being "barely done".  If you like it the other way cook longer.  On another zucchini note, zucchini have much better flavor when they are small to medium.  I picked my zucchini often so they never get bigger than a medium size and I would encourage you to do the same.  If you end up missing one (they do tend to hide) it will work well for baked recipes like zucchini bread or this chocolate zucchini cupcake.

2 medium zucchini
2 T. butter
Santa Maria Seasoning (this is my favorite but any kind you like will do)

1.  Lay out a double layer of tin foil.  Cut your zucchini into small circles, the skinnier they are the faster they will cook.  Place on tinfoil.  Cut your butter 8 pieces and spread over zucchini.  Sprinkle on your seasoning.  Wrap your tin foil tightly around your zucchini, making sure to keep the zucchini mostly flat.  BBQ on your grill for 8-12 minutes* over medium heat, flipping over half way through.
2.  My husband (who does the actual grilling) says the best thing to do is cook the folded over side first that way the juices won't leak out as much.

* This time is based on my bbq that cooks hot.  Check every 2-3 minutes, after 10 minutes, if you need to, to make sure it is not over done.

Monday, April 12, 2010

Roasted Asparagus

It's that time of year!  We love when asparagus comes in season (at least now I do).  As I kid my mother would send us out to collect it wild along our ditch banks and I dreaded it.  I hated eating it and always thought it was too mushy.  When I tried it again as an adult I fell in love, (thanks Mom).  I love the flavor and healthiness of this recipe, plus I cook it till it is barely done and still crisp, so no mushiness here.

2 lbs asparagus
2 T. olive oil
1 T. Kosher salt

* Preheat oven to 450 degrees.  Wash asparagus and cut off bottom 1-2 inches (it really just depends on how thick your asparagus is, thinner ones cut off closer to 1 inch, thicker ones more) of each asparagus stalk.  Dry off any excess water from washing and place in 9 x 13 pan.  Drizzle with olive oil and toss to cover all stalks.  Sprinkle on salt.  Put in oven and cook for 15-20 minutes.  After about 10 minutes rotate pan and toss asparagus.  Let cook until it reaches your desired tenderness.  

* I like it barely done so I do about 15 minutes but if you want it softer, cook longer.
Blogging tips